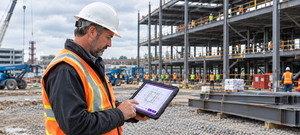
Construction site photo documentation is the process of capturing, organizing and using jobsite images, so the whole team has one shared visual record instead of photos that are scattered across multiple sources.
Key Takeaways
- Construction site photo documentation works in three stages: capture, organize, and use. Skip one and the whole system weakens.
- Most teams already take photos. What they lack is a schedule, a naming system, and one place to store everything.
- Good documentation needs context. A close-up shot without a wider frame is close to useless six weeks later.
- Consistent progress photos protect against disputes, speed up daily reports, and give remote stakeholders real visibility.
- Photo documentation is the foundation reality capture builds on. Reality capture extends with 360-degree and 3D scanning tools that make comparisons measurable.
What is Construction Site Photo Documentation?
A PlanGrid report found construction teams lose an average of 35% of their time to non-productive work. A lot of that is just hunting for information that should have been recorded in the first place. Photo documentation exists to close that gap.
Most jobsites already generate plenty of images. A site manager photographs a walkthrough. A subcontractor snaps progress shots. An engineer captures a wall before it closes up. By Friday, there are hundreds of photos spread across phones, texts, and email threads, with no labels and no shared home.
That’s not documentation. That’s just photos. Construction site documentation becomes useful only once it’s systematic: captured on a schedule, organized in one place, and actually referenced later.
The word ‘systematically’ is doing most of the work in that definition. A team that takes a lot of photos but stores them randomly is technically documenting the site, they’re just not getting much return on it. The teams that get real value out of construction progress documentation treat it as a process with an actual owner, not just a habit everyone’s supposed to remember.

Why Construction Progress Photo Documentation Matters
The value shows up less in the photos themselves and more in what teams can do with them.
Dispute resolution: Timestamped progress photos are hard to argue with. When a contractor and client disagree on what was installed and when, a dated photo settles it faster than a conversation does.
Daily reports: Reports built around real images are easier to write and more convincing to read. A report that says “framing complete on level 3” is fine. One with a photo attached is better.
Visibility for remote stakeholders: Owners and investors who can’t walk the site every week still need to know where things stand. Organized construction project photo documentation gives them that without a site visit.
Quality control: Comparing today’s photos against last week’s, or against the drawings, is how deviations from plan get caught early instead of after drywall goes up.
Institutional knowledge: A well-documented project becomes a reference for the next one. That’s worth more once a team has run the same process across a few jobs and can actually compare them.
How the Capture, Organize and Use Framework Works
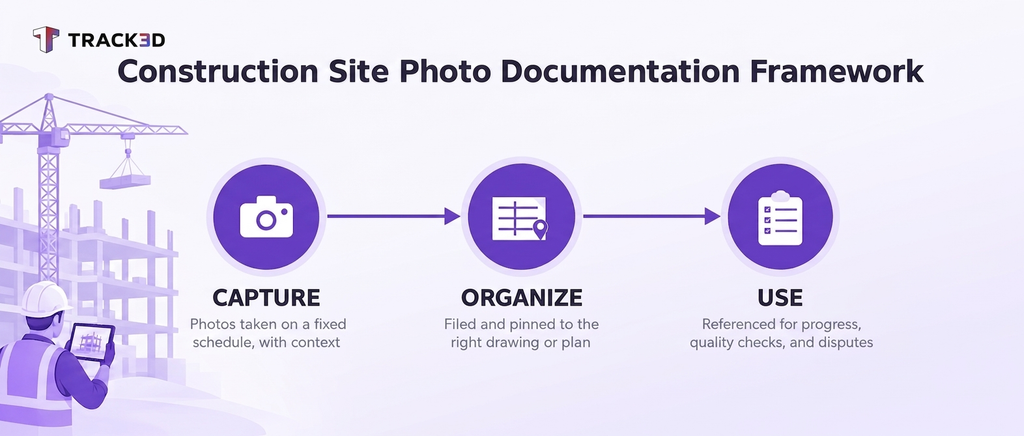
Photo documentation breaks down into three stages. Each one depends on the last, so skipping a step doesn’t save time, it just moves the problem downstream.
1. Capture: Take the right photos, of the right areas, with enough context, on a fixed schedule. This is where most teams already do something, just not consistently.
2. Organize: Once images are captured, they need a folder structure and a naming system that’s searchable. Skip this and nobody can find anything when they actually need it.
3. Use: The archive only pays off when someone applies it: for progress tracking, quality checks, or lessons carried into the next project. A folder full of unused photos isn’t documentation. It’s just storage.
A Practical Schedule and Checklist for Site Documentation
Here’s a simpler version of the schedule that tends to work across most jobsites.
| Frequency | What to Capture |
| Daily | Active work zones, from consistent angles |
| Weekly | Full site overview, same vantage points each time |
| Milestone-based | Before and after pours, structural completions, MEP rough-in, pre-inspection walkthroughs, handover |
Before closing out any documentation session, run through this short list:
- Is there a wide, contextual shot alongside every close-up?
- Are images renamed and filed the same day, not “later”?
- Are photos linked to the relevant drawing or floor plan location?
- Are captures going into shared storage, not sitting on someone’s phone?
A decent smartphone covers most day-to-day needs, and drones fill in spots that are hard or unsafe to reach on foot. The one upgrade worth making is 360-degree cameras for complex structural or MEP work, since flat photos just can’t give you the spatial context those jobs need.
None of this has to be complicated. Most teams that struggle aren’t short on equipment, the real gap is a schedule paired with a place to store everything afterward. Get those two things right, and the tooling question gets a lot easier.
Common Mistakes That Break Construction Visual Documentation
- No fixed schedule: Photos get taken when someone remembers, not as part of the routine. Build capture into the daily workflow instead of leaving it to memory.
- No naming or filing system: Images sit in a generic camera roll with no structure. The naming convention doesn’t need to be clever, just applied the same day, every time.
- Photos stuck on personal devices: If images live only on one person’s phone, the rest of the team has no access. Route every capture into shared, centralized storage.
- Missing context: A close-up with no wider shot tells you what, but not where. Pair every detail photo with a context shot of the surrounding area.
- Inconsistent coverage: Some zones get photographed constantly, others barely at all. A simple site coverage map solves this, everyone knows which areas to capture and how often.
- Treating it as a box to check: Documentation done purely to satisfy a requirement rarely gets used later. Treat the archive as something the team actually references, not just files somewhere.
How This Fits into Reality Capture
Photo documentation is where most construction teams start, and for a lot of day-to-day tracking, it’s still enough. But it has a ceiling: 2D photos can’t be measured against a model, and comparing “roughly the same angle” across weeks only gets you so far.
That’s the gap reality capture is built to close. It utilizes 360-degree cameras, drones, and laser scanners to create spatial jobsite records. Teams can compare directly against BIM, not just against last week’s photo. Construction teams who are already using already consistent photo documentation tend to easily adopt reality capture, as it requires the same capture habits.
Tools like Track3D are built on that foundation. Track3D enables teams to turn site images into a comparable, measurable jobsite record instead of a folder full of images. Over time, that shifts photo documentation from a record-keeping task into Reality Intelligence: an objective, structured view of how a project is progressing.
That said, photo documentation isn’t something every project needs to outgrow immediately. Smaller jobs, or teams just getting their process in order, often get most of the value from a disciplined photo habit alone. Reality capture pays off most once documentation is already consistent, and the team’s ready to compare progress against a model, instead of digging through images across a dozen folders.
See How Track3D Handles Capture, Organize, and Use
Whether your photos are coming from a phone, a fixed camera, or a full walkthrough, Track3D keeps them tagged to your drawings and organized automatically, so the habit holds up even when the schedule gets busy. Take a look at what that looks like on a live project.
Frequently Asked Questions
Q: How often should construction sites be photographed?
Active work zones daily, full site overview weekly. Milestones like pours, structural completions, and handover get photographed regardless of the regular schedule.
Q: Who is responsible for site photo documentation?
A designated lead, often a site manager or quality officer, should have consistency and standards. Day-to-day, capturing progress or issues works best as a shared responsibility across the team.
Q: Can smartphone photos work for professional site documentation?
A decent smartphone camera usually covers small-scale projects, but larger or more complex structural work calls for drones and 360-degree cameras, they add coverage and context a mobile just can’t match.
Q: What’s the difference between photo documentation and reality capture?
Photo documentation is standard 2D images captured systematically across a site. Reality capture adds 360-degree cameras, drones, and laser scanning on top of that, so instead of just photos, you get spatial, measurable records of the site that you can compare directly against design models.
Q: How long should construction site photos be retained?
At minimum, through the defect liability period, typically 12 months after completion. Many teams now keep documentation for the full building lifecycle, since storage costs keep dropping.